 Share


Key Takeaways
- Kling Motion Control transfers movement from a reference video to a character image.
- Kling 2.6 handles full-body movement, gestures, and scene control through prompts.
- Kling 3.0 adds Element Binding for stronger facial identity across complex movement.
- Matching the body framing of both inputs can improve motion transfer.
- Clear, well-lit reference footage gives the model better motion and facial information.
- Framia Pro lets you combine Kling with other AI models, image generation, editing, audio, Brand Kits, and publishing tools.
- A simple six-steps workflow is enough to create and prepare a motion-controlled video.
You have a still photo of a character, and a video of someone walking, gesturing, or talking the way you want your character to move. Kling Motion Control takes the movement from the second and puts it on the first, such as gestures, walking, and even lip-sync. Here's how to run it, what changes between Kling 2.6 and 3.0, and how Framia Pro fits into the workflow once your clip is ready.
What is Kling motion control?
Kling motion control is an AI-powered feature developed by Kuaishou that lets you transfer real-world movement from a reference video onto a character in a newly generated clip. Instead of describing motion through text alone, you upload a video of someone performing an action — a dance, a martial arts move, an emotional expression — and the AI maps that movement frame by frame onto your chosen subject.
The result is a generated video where your character moves exactly as the reference does, while preserving their visual identity, clothing, and scene context.
Available across Kling VIDEO 2.6 and the newer Kling VIDEO 3.0, motion control has evolved from a basic body-transfer tool into a system capable of handling complex facial expressions, 360-degree head rotations, partial occlusion recovery, and cinematic camera control.
How does Kling AI motion control work? Core features explained
Now that you understand the basics, let’s break down the core Kling AI motion control features that power realistic, cinematic animation.
Motion extraction from reference videos
Kling analyzes your uploaded reference video frame by frame, extracting gestures, body positions, timing, and transitions. That extracted motion blueprint is then applied to your chosen subject — whether it's a person, an illustrated character, or a product mascot.
Element binding for facial identity
One of the most powerful features in Kling 3.0 is Element Binding. You create an "element" by uploading images or short videos of your character's face from multiple angles. Kling then binds this facial data to the generated output, ensuring that the character's face stays recognizable and consistent — even when the action involves full head turns, close-ups, or partial face occlusion.
Character orientation control
By default, Kling generates video where the character's orientation follows the motion reference (Character Orientation Matches Video). Alternatively, you can select "Character Orientation Matches Image," which locks the character's facing direction to match the source image while the movements from the reference are still applied. This unlocks cinematic camera movements, such as zoom in, zoom out, camera up, camera down, all controlled through text prompts.
The motion library
Not everyone has a ready-made reference video to upload. Kling's built-in Motion Library provides a curated collection of pre-made action clips you can select directly — no filming required. Browse categories ranging from everyday gestures to high-energy performances and apply them instantly to your character image. It's the fastest way to get started with Kling motion control without any additional assets.
How I Tested Key Features of Kling Motion Control
Before creating a complete campaign or scene, I tested Kling Motion Control with a small, controlled setup using the same type of assets I planned to use later.
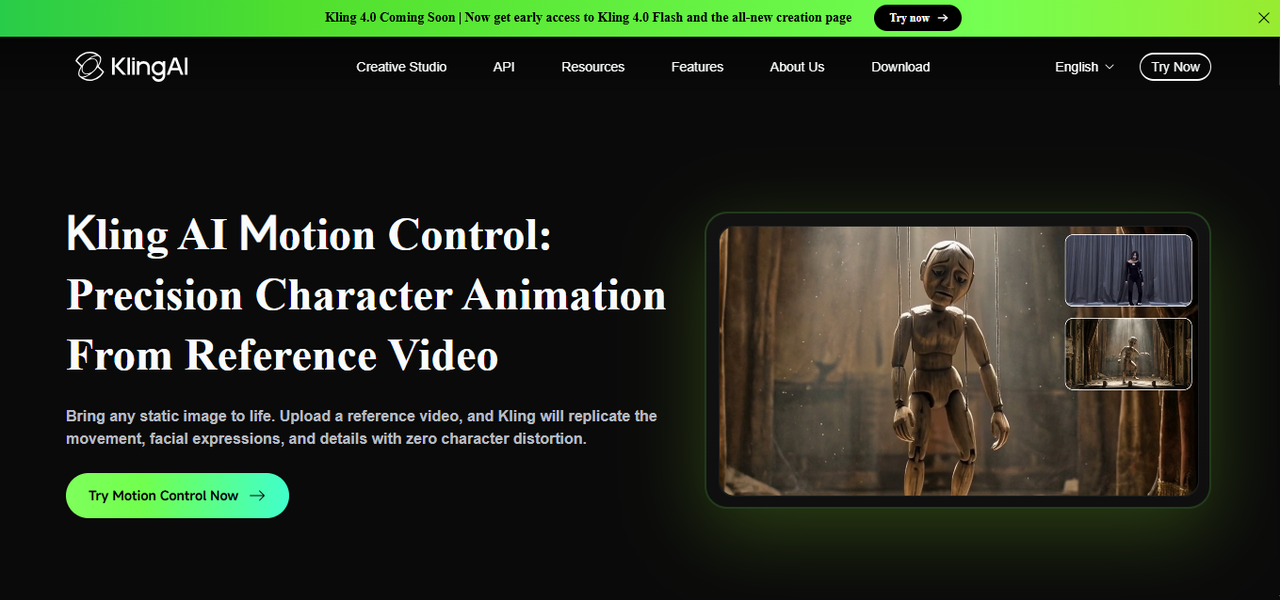
I started with one clear character image and a short reference clip containing one recognizable action. This made it easier to identify whether a problem came from the source image, the motion reference, the prompt, or the generation settings.
I checked five key areas:
- Motion accuracy: I compared the generated video with the reference clip to see whether the character reproduced the main movement, including its timing and direction.
- Body stability: I inspected the hands, arms, legs, face, and overall proportions for warping, extra limbs, unnatural joints, or sudden changes in body shape.
- Face consistency: I checked whether the character continued to resemble the source image throughout the clip, especially during turns and faster movements.
- Framing: I reviewed whether the character stayed inside the intended composition or moved outside the frame during the action.
- Scene quality: I checked whether the background, lighting, clothing, and overall visual style followed the prompt without introducing distracting changes.
I also tested how Kling handled different motion types. Simple actions, such as walking, turning, waving, or raising an arm, were useful for checking basic tracking. More complex movements helped reveal problems with body structure, occlusion, and fast transitions.
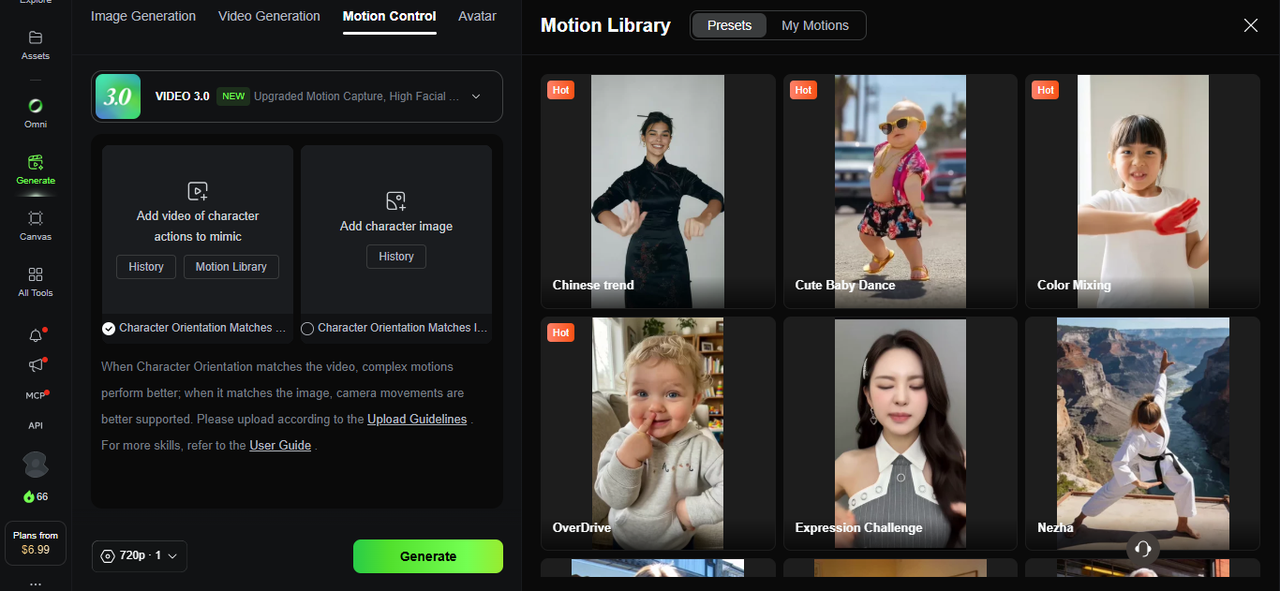
In my test, Kling Motion Control reproduced the main movement from the reference clip, with the character following the action through most of the video. The overall motion looked natural, although some small details, such as hand positioning and body proportions, showed minor inconsistencies. The character remained recognizable.
When a result failed, I changed only one input at a time. I tested a wider character image, a slower or clearer reference clip, a more detailed facial reference, and a shorter prompt before changing the entire workflow. This made it easier to determine which adjustment improved the result and which changes were unnecessary.
Kling 2.6 vs Kling 3.0 motion control: What's the difference?
Kling 2.6 and Kling 3.0 share the same basic idea, but the newer version focuses more on facial consistency and complex performances.
| Feature | Kling 2.6 Motion Control | Kling 3.0 Motion Control |
| Motion reference video | Yes | Yes |
| Character image | Yes | Yes |
| Full-body movement | Yes | Yes |
| Hand gestures | Yes | Yes |
| Motion Library | Yes | Yes |
| Character orientation options | Yes | Yes |
| Facial Element Binding | No | Yes |
| Multi-angle facial references | Limited | Yes |
| Complex facial expressions | Good | Better |
| Facial consistency during movement | Good | Improved |
| Best use | General motion transfer | Character-focused performances |
Kling's official documentation positions 3.0 as an upgrade to the Motion Control system introduced in 2.6, with stronger facial consistency during complex, multi-angle, and longer movements.
Choose Kling 2.6 when you need straightforward motion transfer and want to work with the established workflow.
Choose Kling 3.0 when facial identity matters more, especially for close-ups, expressions, head turns, and character-driven scenes.
How to use Kling motion control: Step-by-step
Here is the standard workflow on the Kling AI web platform:
Step 1: Upload your motion reference
Select a video of the action you want to replicate. You can upload from local storage or choose from the Motion Library. The clip should be 3–30 seconds, continuous, and single-shot (no cuts or camera changes).
Step 2: Upload your character image
This is the subject who will perform the motion. Make sure the character's body framing (half-body or full-body) matches the framing of the motion reference for the best results.
Step 3: Bind a Facial Element (Kling 3.0 only)
Click "Bind Facial Element to Enhance Facial Consistency" beneath the character image. You can create a new element by uploading facial reference images or a short facial reference video, or select an existing element from your library.
Step 4: Select character orientation
Choose whether the output should follow the motion reference's camera angle or the image's original orientation.
Step 5: Add a text prompt
Use the prompt field to control background details, lighting, clothing specifics, and other scene elements that aren't defined by the reference image alone.
Step 6: Generate and review
Click Generate. The output video will match the duration of your motion reference clip.
Why use Kling motion control on Framia Pro?
A clip made straight in Kling stays on its own. You end up with one character performing one action, and that's the end of it. On Framia Pro's Workflow Canvas, that same clip becomes a single stage inside a full production.
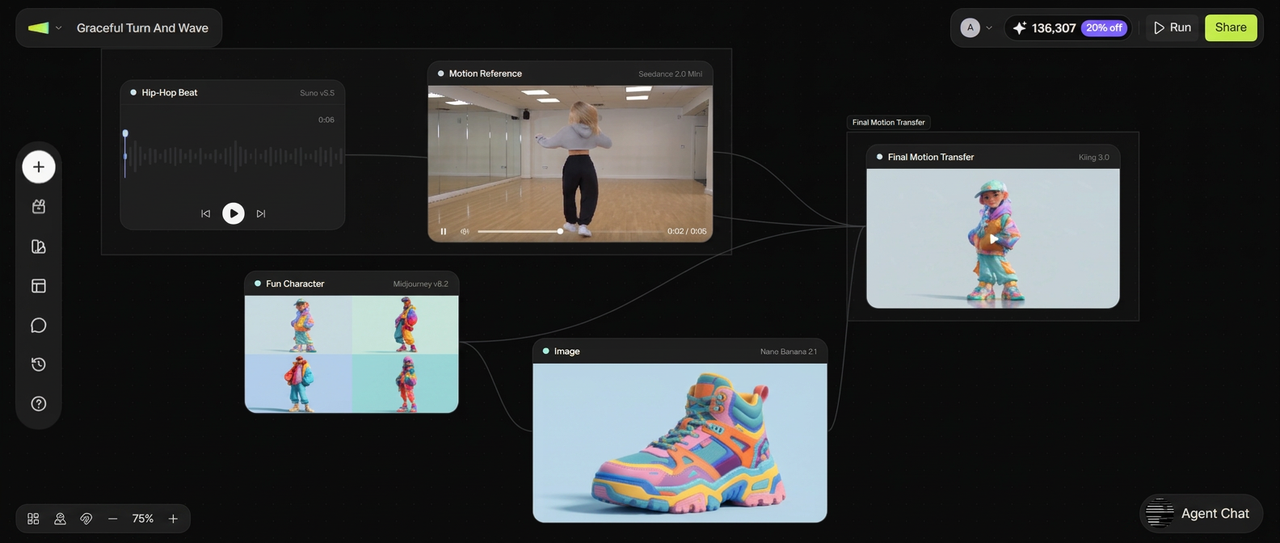
Say the goal is a sneaker ad. You'd start with an Image node and generate a pair of sneakers in a cyberpunk style. That sneaker image feeds into the Kling node, where the model puts the sneakers on the character and has them dance through the motion reference. From there, an Audio Agent node adds a beat-matched electronic track timed to the movement. Every stage sits on the same timeline, so the sneaker design, the motion-controlled video, and the audio connect without exporting anything or switching between separate apps.
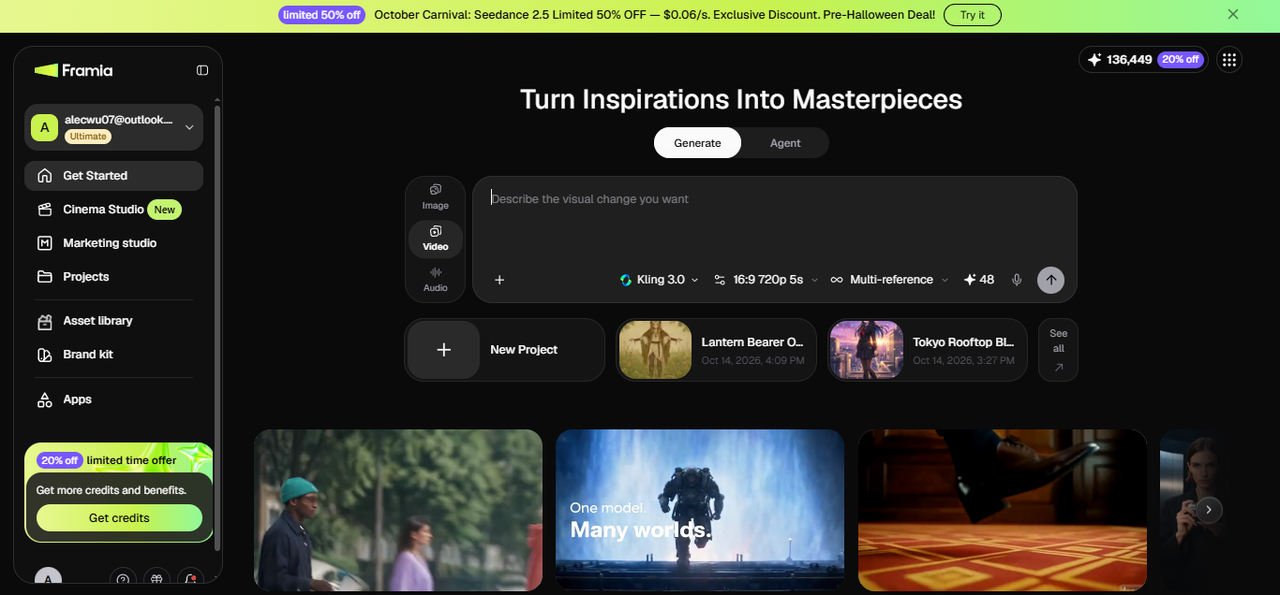
That's the gap between Kling running on its own and Kling working as one node inside a larger system.
Key advantages of Kling AI motion control on Framia Pro
Direct access to the latest versions:
Instantly switch to Kling 3.0 for superior facial consistency, complex emotions, and multi-angle fidelity without leaving the platform.
Build a Motion Workflow With Workflow Canvas
Workflow Canvas puts you in control of each stage of a project. Connect an image or character reference to a video generation node, pick the AI model, adjust the aspect ratio, and rerun a single node whenever you want a different result. Multiple nodes can also feed into later ones, so a project might carry image generation, video generation, audio, subtitles, and editing side by side.
For a Kling Motion Control project, that opens up a path like this:
Character image → sneaker or product design (Image node) → motion-controlled video (Kling node) → beat-matched track (Audio Agent) → captions and export
Use Brand Kit for Branded Character Content
If you're creating branded videos, Framia Pro's Brand Kit can store details such as colors, fonts, logos, product information, and slogans.
You can create a Brand Kit from the sidebar or inside a canvas, then apply the saved brand information to projects. This is useful when a motion-controlled character is part of a wider campaign and needs to follow the same brand guidelines across multiple assets.
Start With Viral Video Templates
Framia Pro also offers Viral Remix and pre-built workflows for formats such as UGC Shorts, Marketing Ads, Cinematic Stories, Micro Drama, and Explainer Avatar videos. Start from an existing workflow, swap the assets, adjust the prompts, and rerun the project.
For instance, take a short-form template, swap the original character for your Kling Motion Control output, then adapt the workflow for a sneaker campaign like the one above.
Pros and Cons of Kling Motion Control
Pros
- Transfers recognizable movement from a reference video to a character image with relatively little manual animation work.
- Works well for testing simple actions such as walking, turning, waving, and raising an arm.
- Lets you use a custom character, illustration, or generated image instead of relying only on preset avatars.
- Provides useful controls for evaluating motion accuracy, framing, facial consistency, and scene quality.
- Kling 3.0 Element Binding can improve character identity when additional facial references are available.
- A controlled testing workflow makes it easier to identify whether problems come from the image, reference clip, prompt, or settings.
Cons
- Fast, complex, or heavily occluded movements can produce warped limbs, unstable joints, or inconsistent body proportions.
- Hands, faces, and other detailed areas may lose consistency during turns or rapid motion.
- The character may drift outside the intended frame or change position unexpectedly.
- Results depend heavily on the quality, clarity, and pacing of the reference video and source image.
- A single generation may not be reliable enough for a final campaign, so multiple tests and revisions are often necessary.
- Additional facial references and Element Binding may improve identity, but they do not eliminate motion or anatomy errors.
Kling motion control: Tips and tricks for better results
Here are 5 practical, battle-tested tips to dramatically improve the quality, consistency, and realism of your Kling motion control videos (works great for both Kling 2.6 and 3.0):
- Match body framing in both inputs: The single most common cause of poor output is a mismatch between the reference video and the character image. If your motion reference shows a full-body subject but your character image is cropped to the waist, the AI will struggle to map lower-body motion accurately. Always align half-body to half-body and full-body to full-body before generating.
- Use moderate-speed, wide-range motion references: Kling performs best when the reference video features a broad range of movement at a measured pace. Extremely fast motions can result in shorter-than-expected output, because the model extracts only the usable continuous action segments. If your output keeps coming in under the expected duration, slow down the reference action and try again.
- Build richer facial elements for Kling 3.0: The quality of your Element directly impacts facial consistency in the output. For basic head turns, upload a front-facing image alongside left and right profile shots. To capture expressions accurately, add a neutral front-facing image paired with the target expression. When the performance involves rapid emotional transitions combined with head movement, uploading a short face video provides the richest and most continuous facial data.
- Give characters room to move: For large physical motions like jumping, spinning, or wide arm movements, the character in the reference image needs empty space around them. A tightly framed portrait leaves no room for the AI to render full movement without cropping or distortion. Wider framing in the character image consistently produces cleaner results on dynamic actions.
- Control the scene with your text prompt: The motion reference drives character movement — the text prompt drives everything else. Use it to define the environment, lighting mood, background elements, and secondary subjects that the reference video cannot provide. A well-written prompt like "a corgi runs in, circling around the girl's feet" can add scene depth and narrative detail that transforms a simple motion clip into a complete video.
Use cases: What can you create with Kling motion control?
Kling motion control works across a wide range of creative and commercial projects. Here are the most impactful ways creators use it.
- Social media content: Apply trending dances or expressive gestures to branded avatars, illustrated characters, or even product mascots for TikTok, Instagram Reels, and YouTube Shorts.
- Branded video campaigns: Marketing teams can animate a single character with the same motion blueprint across multiple visual formats, keeping performance consistent while adapting the background or styling per platform.
- Film and scene previsualization: Directors and storyboard artists can test camera blocking, character choreography, and action sequences before production begins, using Kling to render rough but spatially accurate motion mockups.
- Product video creation: Bring still product images to life with controlled camera movements and ambient motion, producing commercial-quality clips without a studio.
- Music video production: Choreograph high-energy performance sequences for musicians, using a reference dance video and applying it to a custom character or stylized avatar.
Final Thoughts
Kling motion control is currently one of the most powerful tools available for creators who want director-level control over AI-generated videos. Whether you’re using Kling 2.6 for fast iterations or Kling 3.0 for superior facial consistency and complex performances, mastering motion transfer can dramatically elevate your content quality.
By following the right upload guidelines, framing techniques, and the five key tips shared above, you can achieve remarkably realistic and consistent results. On Framia Pro, this becomes even more powerful — with seamless integration, intelligent agents, and an end-to-end creative canvas that saves you time and credits.
The future of video creation is here. Start experimenting with Kling motion control today, refine your skills, and bring your creative vision to life like never before.
FAQs
- Can I use Kling AI motion control for free?
Yes, Kling AI offers free credits to eligible users, which you can use for Motion Control depending on account allowances and current credit policies. Framia Pro provides generous free trials and optimized usage. Paid plans unlock longer clips and higher-priority generation.
- What are the video upload guidelines for Kling motion control?
Videos must be 3–30 seconds, a single continuous shot, with no cuts or camera changes. One subject clearly visible throughout. Short edge minimum 340px, long edge maximum 3,850px. Real human actions recommended for best motion accuracy.
- What is element binding in Kling motion control?
Element Binding is a Kling 3.0 feature that anchors a character's facial identity to the output. You upload multi-angle facial images or a short video, and Kling uses that data to keep the face consistent across all frames.
- Is Kling AI safe to use?
Yes, Kling AI is safe to use on Framia Pro. The platform applies usage policies, content filters, and community guidelines to help ensure outputs are appropriate and suitable for professional video creation.
- How long can Kling motion control videos be?
When using Kling motion control on Framia Pro, generated videos match the duration of the uploaded motion reference, with a supported range of 3 to 30 seconds. If the motion is too fast or complex, the output may be shorter as the model extracts only usable continuous action.
- Can Kling Motion Control work with anime or 3D characters?
Yes. Kling's Motion Control feature can be used with stylized and human-like characters when the source image provides a clear subject and the motion reference matches its general proportions and orientation. Results can vary depending on the character design and reference footage.
- Does Kling Motion Control support more than one character in the same reference video?
Multi-character references cannot guarantee individual control over each person; it is recommended to use a clear main subject.
- Is Kling 3.0 Motion Control free to try?
Kling 3.0 Motion Control may be available through free credits or trial access, depending on the current plan and account limits. Check the Kling interface for the latest availability before generating, as access and credit requirements can change.